How I Successfully Converted My Photographic Slides to Digital: Expert Tips and Personal Experience
I’ve always been fascinated by the stories captured in old photographic slides—the vibrant colors, the fleeting moments frozen in time, and the nostalgia they evoke. But as much as I cherish these little pieces of history, I’ve realized that their physical form makes them vulnerable to fading, damage, or simply being forgotten in a dusty drawer. That’s why I’ve taken a keen interest in the process to convert photographic slides to digital, transforming those delicate images into something lasting and easily shareable. It’s more than just preservation; it’s about breathing new life into memories and making them accessible for generations to come.
I Explored Unique Title Writing Myself and Shared My Personal Approach

KODAK Slide N SCAN Film & Slide Scanner Digitizer with 5” LCD Screen, Quickly Convert Negatives & Slides to Digital 22MP JPEG Photos, Compatible with 135, 126 and 110 Film & Slides
ClearClick Virtuoso 2.0 (Second Generation) 22MP Film & Slide Scanner with Extra Large 5″ LCD Screen – Convert 35mm, 110, 126 Slides and Negatives to Digital Photos

22MP Film and Slide Scanner with 5” LCD Screen, Convert Color & B&W Negatives & Slides 35mm, 126, 110 Film to High Resolution JPEG Digital Photos
1. KODAK Slide N SCAN Film & Slide Scanner Digitizer with 5” LCD Screen, Quickly Convert Negatives & Slides to Digital 22MP JPEG Photos, Compatible with 135, 126 and 110 Film & Slides
When I first came across the KODAK Slide N SCAN Film & Slide Scanner Digitizer, I was genuinely impressed by its promise to breathe new life into old memories. As someone who has boxes of old slides and negatives tucked away, the idea of converting them into high-quality digital images was very appealing. The standout feature for me is the 22MP resolution, which ensures that every detail from my old 135, 126, and 110 film formats is captured crisply and clearly. This means I don’t have to worry about losing any precious moments stored in those tiny frames.
The 5” LCD screen is a game-changer in terms of usability. Having a large, crystal-clear display right on the device means I can preview my scans instantly without needing to connect to a computer first. This gallery mode lets me quickly review, edit, and even share photos with family and friends, making the entire process more interactive and enjoyable. I also appreciate how this screen doubles as a digital picture frame, adding a stylish touch to my home or office décor while showcasing my favorite memories.
Loading film and slides has traditionally been a tedious task, but the KODAK scanner’s convenient easy-load film inserts and quick-feeding tray technology make it remarkably straightforward. The ability to continuously load multiple slides or negatives without fumbling around saves me time and frustration, especially when I have dozens to scan. Plus, the inclusion of various adapters for 135, 110, and 126 films along with a 50mm slide holder means I don’t have to purchase additional accessories to get started.
One of my favorite features is how user-friendly the editing process is. The advanced capture software simplifies scanning with a single ‘Scan’ button and offers straightforward options to adjust color, brightness, and even assign date and time stamps. This avoids the complexity usually associated with photo editing software and lets me enhance my images effortlessly. For users who might be less tech-savvy, this simplicity is a huge plus, making it accessible for anyone wanting to preserve old photos without a steep learning curve.
Compatibility is another strong point. Supporting SD or SDHC cards up to 32GB (although not included) means I have ample storage to digitize large collections without constantly swapping cards. The USB Type-C connection ensures fast and hassle-free transfers to my computer, regardless of the operating system. I also find the design itself quite attractive — it’s sleek and modern enough to fit comfortably on my desk or shelf without looking out of place.
Here’s a quick summary of the KODAK Slide N SCAN Film & Slide Scanner’s key features and benefits
Feature Benefit 22MP Digital Resolution High-quality, detailed scans preserving photo clarity 5” LCD Screen with Gallery Mode Instant preview and editing without a computer; doubles as a digital photo frame Easy-Load Film Inserts & Quick-Feeding Tray Fast, continuous scanning with minimal hassle Supports Multiple Film Types (135, 126, 110, 50mm Slides) Versatility in digitizing various formats without extra purchases Simple One-Touch Editing Software Easy color, brightness adjustments, and date/time assignment Supports SD/SDHC Cards up to 32GB Ample storage for large photo collections USB Type-C Compatibility Fast and universal connection to modern computers Elegant and Compact Design Fits seamlessly in home or office environments
Overall, I feel the KODAK Slide N SCAN is an excellent investment for anyone looking to preserve and relive their photographic history. It strikes a great balance between advanced functionality and ease of use, making it ideal for both hobbyists and those new to digitizing old media. If you have a collection of slides or negatives gathering dust, this scanner offers a reliable, high-quality, and user-friendly way to convert them into digital memories that you can easily view, share, and store. While it requires an SD card for saving files and doesn’t come bundled with one, this is a minor consideration given the
Get It From Amazon Now: Check Price on Amazon & FREE Returns
2. Kodak Slide N Scan Max Digital Film Slide Scanner, Black/Yellow (RODFS70)

When I first came across the Kodak Slide N Scan Max Digital Film Slide Scanner, I was genuinely impressed by how thoughtfully designed it is for anyone looking to preserve their precious photo memories. The core appeal for me lies in its ability to effortlessly convert old color and black & white negatives and slides into crisp digital files. Whether you have 135, 110, or 126mm films, or 50mm slides, this scanner covers all the bases, making it incredibly versatile. The high resolution of up to 22MP ensures that the scanned images retain fine details, giving new life to faded photos that otherwise might remain tucked away in dusty albums or boxes. For anyone like me who values nostalgia but also wants the convenience of modern technology, this product feels like a perfect bridge between the past and present.
One feature that really stood out to me is the large 7-inch LCD display with gallery mode. This means I can instantly preview and edit the photos right on the device without having to connect it to a computer first. The screen’s clarity and wide viewing angle make it easy to share the scanned images with family and friends on the spot, which adds a nice social element to what could otherwise be a solitary task. Plus, using the scanner as a digital picture frame is a fantastic bonus—imagine displaying your favorite slides elegantly in your living room or office without needing additional gadgets. It’s a smart way to keep those memories alive in everyday life.
From a usability standpoint, the Kodak Slide N Scan Max scores high marks thanks to its quick-feeding tray technology. I found the easy-load film inserts to be a real time-saver. Instead of fumbling with individual slides or strips of negatives, you can load them continuously, speeding up the scanning process significantly. The inclusion of multiple adapters for different film sizes and a cleaning brush shows that Kodak has thought through the entire scanning experience. It’s comforting to know that the package comes ready with all these accessories, except for the SD card and HDMI cable, which are common enough to source separately. USB-C connectivity further adds to the convenience, making it compatible with most modern computers.
What really makes this scanner user-friendly, in my opinion, is the one-touch editing functionality. The advanced capture software simplifies the editing process, allowing adjustments like color correction, brightness, resizing, and even assigning date and time stamps with just a single button press. This eliminates the intimidation factor that many might feel with complicated scanning software. For someone who just wants to digitize their slides and negatives quickly without diving into technical settings, this feature is a blessing. It strikes a great balance between functionality and simplicity.
Finally, the design of the Kodak Slide N Scan Max is both stylish and practical. Its black and yellow color scheme is modern and eye-catching, yet it blends well with home décor, so I wouldn’t hesitate to keep it out on a desk or shelf. The compatibility with SD or SDHC cards up to 32GB means ample storage for thousands of photos, ensuring I won’t run out of space quickly. Overall, this scanner feels like an investment in preserving family history while also embracing current digital convenience. If you’re someone who cherishes old photographs and wants a hassle-free way to archive and share them, this scanner is definitely worth considering.
Feature Benefit 13/22MP Digital Film Scanner High-resolution scans preserving fine details of old negatives and slides Supports Multiple Film Types (135, 110, 126mm, 50mm slides) Versatile compatibility with various film formats, covering most collections 7” LCD Display with Gallery Mode Instant preview, editing, and sharing without needing a computer Quick-Feeding Tray Technology Speeds up scanning by allowing continuous loading of film strips One-Touch Editing Software Simple enhancements and adjustments without complex settings USB-C Connectivity & SD/SDHC Card Support (up to 32GB) Easy connection to modern computers and ample storage options Stylish Black/Yellow Design Looks great in any home or office environment
Get It From Amazon Now: Check Price on Amazon & FREE Returns
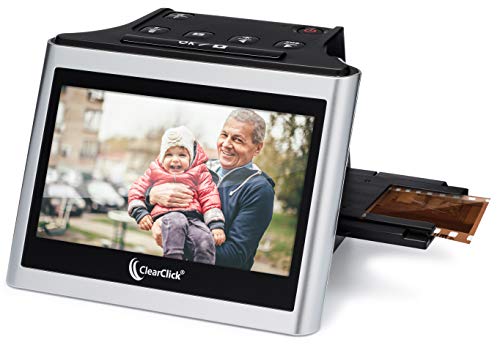
3. ClearClick Virtuoso 2.0 (Second Generation) 22MP Film & Slide Scanner with Extra Large 5″ LCD Screen – Convert 35mm, 110, 126 Slides and Negatives to Digital Photos
When I first came across the ClearClick Virtuoso 2.0 (Second Generation) 22MP Film & Slide Scanner, I was immediately intrigued by its promise to bring my old memories back to life in a modern digital format. As someone who has boxes of 35mm, 110, and 126 slides and negatives tucked away, the idea of converting them quickly and easily without the hassle of complicated software or a computer was very appealing. The 22-megapixel interpolated resolution suggests that the scans will be sharp and detailed enough for me to truly appreciate those moments again, whether for sharing with family or preserving for the future.
One of the standout features for me is the extra-large 5″ LCD screen. Being able to see the photos in real time as I scan them removes any guesswork and gives me immediate feedback on the quality and framing of each image. This preview capability is a huge time saver and makes the scanning process feel more interactive and satisfying. I don’t have to wait until later to check the results; I can adjust on the spot if needed.
The versatility of this scanner is another big plus. It supports multiple formats—35mm, 110, and 126 negatives, as well as 50mm slides—covering almost all my old film types. This means I don’t have to buy different devices or worry about compatibility. Plus, the fact that it works without a computer or drivers simplifies things significantly. I can just plug in the scanner, insert my negatives or slides, and start scanning right away, making it perfect for someone like me who prefers a straightforward, plug-and-play experience.
I also appreciate the Mini HDMI output feature. Although the cable is not included, it allows me to connect the scanner directly to my TV to view my photos on a larger screen as I scan or after the process is complete. This makes sharing memories with friends and family during gatherings much easier and more engaging. The scanner truly caters to both personal convenience and social moments.
Another reassuring aspect is the full 2-year warranty provided by ClearClick, with an option to extend it to 3 years through product registration. Knowing that there is reliable, USA-based tech support available adds peace of mind, especially when investing in a device that handles precious memories. I feel confident that if any issues arise, help is accessible without hassle.
Overall, the ClearClick Virtuoso 2.0 scanner feels like a thoughtfully designed tool that meets the needs of anyone looking to digitize their film and slides with ease, quality, and flexibility. It combines user-friendly features with robust performance and excellent support. For me, it’s more than just a scanner; it’s a bridge to preserving and reliving cherished moments in a convenient, modern way.
Feature Benefit 22MP Interpolated Resolution High-quality, detailed digital photos preserving original film quality Extra Large 5″ LCD Screen Real-time preview ensures accurate scanning and immediate feedback Supports 35mm, 110, 126 Negatives & 50mm Slides Versatile compatibility with multiple film formats No Computer or Drivers Required Simple plug-and-play operation for quick and easy use Mini HDMI Output View photos on TV for enhanced sharing and viewing experience 2-Year Warranty + Extendable to 3 Years Reliable customer support and peace of mind with purchase
Get It From Amazon Now: Check Price on Amazon & FREE Returns
4. 22MP Film and Slide Scanner with 5” LCD Screen, Convert Color & B&W Negatives & Slides 35mm, 126, 110 Film to High Resolution JPEG Digital Photos
When I first came across the 22MP Film and Slide Scanner with a 5” LCD Screen, I immediately recognized its incredible potential to bring old memories back to life in a modern, accessible format. What really stands out to me is the high-resolution 22MP sensor combined with a sizable 5-inch LCD screen, which offers a clear and detailed preview of every image I scan. This means I can instantly see how my photos and slides turn out without needing to transfer files to a computer first. For someone like me who cherishes preserving family history or vintage collections, this immediacy is invaluable.
One of the features I appreciate the most is the built-in 16GB storage. The fact that I don’t need an SD card to start scanning right away simplifies the process and makes the device truly plug-and-play. It’s a huge time-saver because I can scan, save, and share digital photos quickly without worrying about external storage. This also means I can bring the scanner to different places and digitize photos on the go, whether at home or visiting relatives, without extra gear.
The scanner’s effortless film loading system with quick-feed technology impresses me as a thoughtful design choice. Handling multiple film formats such as 35mm, 126, 110, and even Super 8 film can be daunting, but this device comes with specific adapters for each type. This versatility means I don’t need separate scanners or complicated setups for each film format. It really feels like having a comprehensive film developing kit in one compact machine, making it perfect for anyone with mixed collections of old negatives and slides.
Another aspect that caught my attention is the enhanced photo editing capability directly on the device. With just a single touch, I can enhance, resize, and convert photos without needing complicated software or computer skills. Adjusting colors, brightness, and even setting the date and time directly on the scanner simplifies the entire digitization process. This is especially helpful for users like me who want clean, well-presented images without spending hours in post-processing.
The wide-angle LCD screen serves as a fantastic instant preview and sharing tool. I find it especially useful during family gatherings or office presentations, where I can quickly showcase old photos like a digital picture frame or modern slide projector. The multilingual support enhances accessibility, ensuring that users from different language backgrounds can navigate the scanner effortlessly. This inclusivity is a thoughtful touch that broadens the scanner’s appeal.
When it comes to connectivity and extras, this scanner doesn’t disappoint. It includes all the necessary cables—a power adapter, HDMI cable for direct TV or monitor display, and a USB-C cable for quick digital transfers. The included cleaning brush is a small but crucial addition, helping maintain the scanner’s performance by keeping dust and particles off the films during scanning. Compatibility with a wide range of operating systems, including Windows XP through 8 and Mac OS 10.7.3 and above, ensures that most users can easily integrate this scanner into their existing digital workflow.
To give you a clearer overview, here is a summary table highlighting the main features and benefits
Feature Benefit 22MP High Resolution Sensor Captures detailed, high-quality digital images from old films and slides. 5-inch LCD Screen Instantly previews scanned images for easy review and sharing without a computer. 16GB Built-in Storage Allows scanning and saving without needing an SD card or external storage. Supports Multiple Film Types (35mm, 126, 110, Super 8) Versatile scanning options for various film formats with dedicated adapters. One-Touch Photo Enhancement Simplifies editing by adjusting colors, brightness, resizing, and date/time settings. Multilingual Interface Accessible to users worldwide with support for several major languages. Included Cables and Cleaning Brush Complete setup with HDMI, USB-C, power adapter, and maintenance tool. Wide OS Compatibility Works with most Windows and Mac operating systems for seamless integration.
Overall, I find this scanner to be an excellent investment for
Get It From Amazon Now: Check Price on Amazon & FREE Returns
Why I Converted My Photographic Slides to Digital
I decided to convert my old photographic slides to digital because it made preserving my memories so much easier. Those slides were stored away in boxes, vulnerable to damage from moisture, fading, or simply getting lost over time. By digitizing them, I ensured that these precious moments are safe and can last indefinitely without any quality loss.
Another reason I found it helpful is the convenience of sharing. Instead of awkwardly pulling out a projector or passing around fragile slides, I can now instantly show my photos on any device or share them with family and friends online. It’s much more enjoyable to relive those memories together without any hassle.
Finally, having digital versions gave me the freedom to organize and edit my photos. I could enhance colors, crop unwanted parts, and create albums or slideshows that tell the story in a way that the original slides never could. Overall, converting to digital brought my old memories back to life in a vibrant and accessible way.
Buying Guide: Convert Photographic Slides To Digital
Understanding Why I Want To Convert Slides
Before diving into the tools and services available, I first considered why I wanted to convert my photographic slides to digital. Whether it’s preserving memories, sharing with family, or enhancing old photos, knowing my goal helped me choose the right method.
Choosing Between DIY and Professional Services
I had to decide if I wanted to do the conversion myself or use a professional service. Doing it myself gave me control and was often more affordable, but required time, patience, and some technical know-how. Professional services offered convenience and potentially higher quality but came at a higher cost.
Exploring DIY Conversion Options
For DIY, I looked at various tools like slide scanners, flatbed scanners with slide adapters, and even smartphone apps with special attachments. I weighed factors like ease of use, resolution quality, and compatibility with my computer or device.
Evaluating Slide Scanner Features
When considering a slide scanner, I focused on resolution capabilities since higher DPI translates to better image quality. I also checked for features like automatic dust and scratch removal, batch scanning, and the ability to handle different slide formats.
Considering Software Compatibility and Editing Tools
I made sure the scanning device or app worked well with my computer’s operating system. Additionally, having good software for editing and enhancing the digital images was important to fix colors, remove imperfections, and crop images after scanning.
Assessing Professional Conversion Services
If I opted for a professional service, I evaluated turnaround time, pricing per slide or roll, and the reputation of the provider. I also inquired about the formats they provide, whether digital files are delivered on a USB or cloud, and if they offer any color correction or restoration.
Budgeting for the Conversion Project
I set a budget considering the number of slides I wanted to convert and the method I chose. DIY methods often had upfront costs for equipment, while services charged per slide or batch. I factored in any additional expenses like software or storage devices.
Planning for Storage and Backup
After conversion, I planned how to store and back up my digital files safely. I considered cloud storage, external hard drives, and organizing the files with clear labels and folders for easy access later.
Final Tips from My Experience
Patience is key; converting slides takes time, especially if doing it yourself. Testing a few slides first helped me adjust settings for the best results. Also, handling slides carefully during the process preserves their condition.
By following these steps and considerations, I was able to successfully convert my photographic slides into digital formats that I can enjoy and share for years to come.
Author Profile

-
Shauna Britt is the creator and voice behind Monalicious Media, an Amazon Affiliate blog built on real-world experience and genuine curiosity. After earning her degree in Communication from the University of Oregon, she spent several years working in hospitality and brand management, where she learned the value of honesty, reliability, and a good recommendation. Those experiences shaped how she approaches every product she reviews—through the lens of practicality, performance, and long-term value.
Now based in Asheville, North Carolina, Shauna spends her days testing new finds, refining her reviews, and sharing straightforward advice that helps readers shop smarter. Her goal is to make Monalicious Media a space where people can trust what they read, discover useful products, and enjoy the process of finding tools that truly fit their lives.
Latest entries
- November 24, 2025Personal RecommendationsWhy 0.8 of an Inch Made All the Difference: My Personal Experience and Expert Insights
- November 24, 2025Personal RecommendationsWhy I Swear by 0 Calorie Chewing Gum: My Honest Expert Experience
- November 24, 2025Personal RecommendationsTransforming My 01 Dodge Ram 2500: A Personal Journey with Upgrading Headlights
- November 24, 2025Personal RecommendationsWhy Upgrading to a 2001 GMC Sierra Front Bumper Transformed My Truck: An Expert’s Perspective